Fundamentals on How to Draw a Pistol from your holster in 6 Easy Steps
Understanding how to draw your pistol from your holster requires many repetitions and it is just like any other firearm fundamental, it takes time, patience, consistency, and a regular training regimen. All firearms training is a perishable skill set. The importance of drawing from a holster effectively and efficiently can be the difference between life and death in a gunfight.
You may find yourself going against an active shooter or another form of weapon that can cause serious bodily injury or death. Possessing the knowledge and skills to mitigate your high threat situation always comes back to fundamentals. Identifying the threat, deploying your firearm fast, and efficiently, to be on target, is critical – eyes, muzzle, target, or threat, these are three basic terms that will help you stop the threat.
This training is for you, whether you’re a member of the armed forces, law enforcement (LE), or an everyday civilian. Training just doesn’t happen on its own, it takes effort and consistency. Most LE and military only qualify every six months with their firearm. It is up to each individual shooter to maintain a high level of competence and proficiency when it comes to drawing their pistol from their holster.
This lack of training also applies to many civilians who carry concealed firearms. It is very rare that they are putting in the time to become competent with their firearm. I understand that ammunition prices are at an all-time high, but this should not be an excuse for not working on pistol fundamentals, as it is a perishable skill set. You would be surprised how effective snape caps (dummy ammunition) can be for practicing your pistol fundamentals through dry firing. You can maintain up to 80% proficiency without even firing one live round.
It is paramount to incorporate the proper drawing techniques into your training. Always train as you fight, and be ready at all times. Having the skill to protect yourself, your friends and your family, is imperative in today’s society.
Here are the 6 steps to draw your pistol from your holster.
-
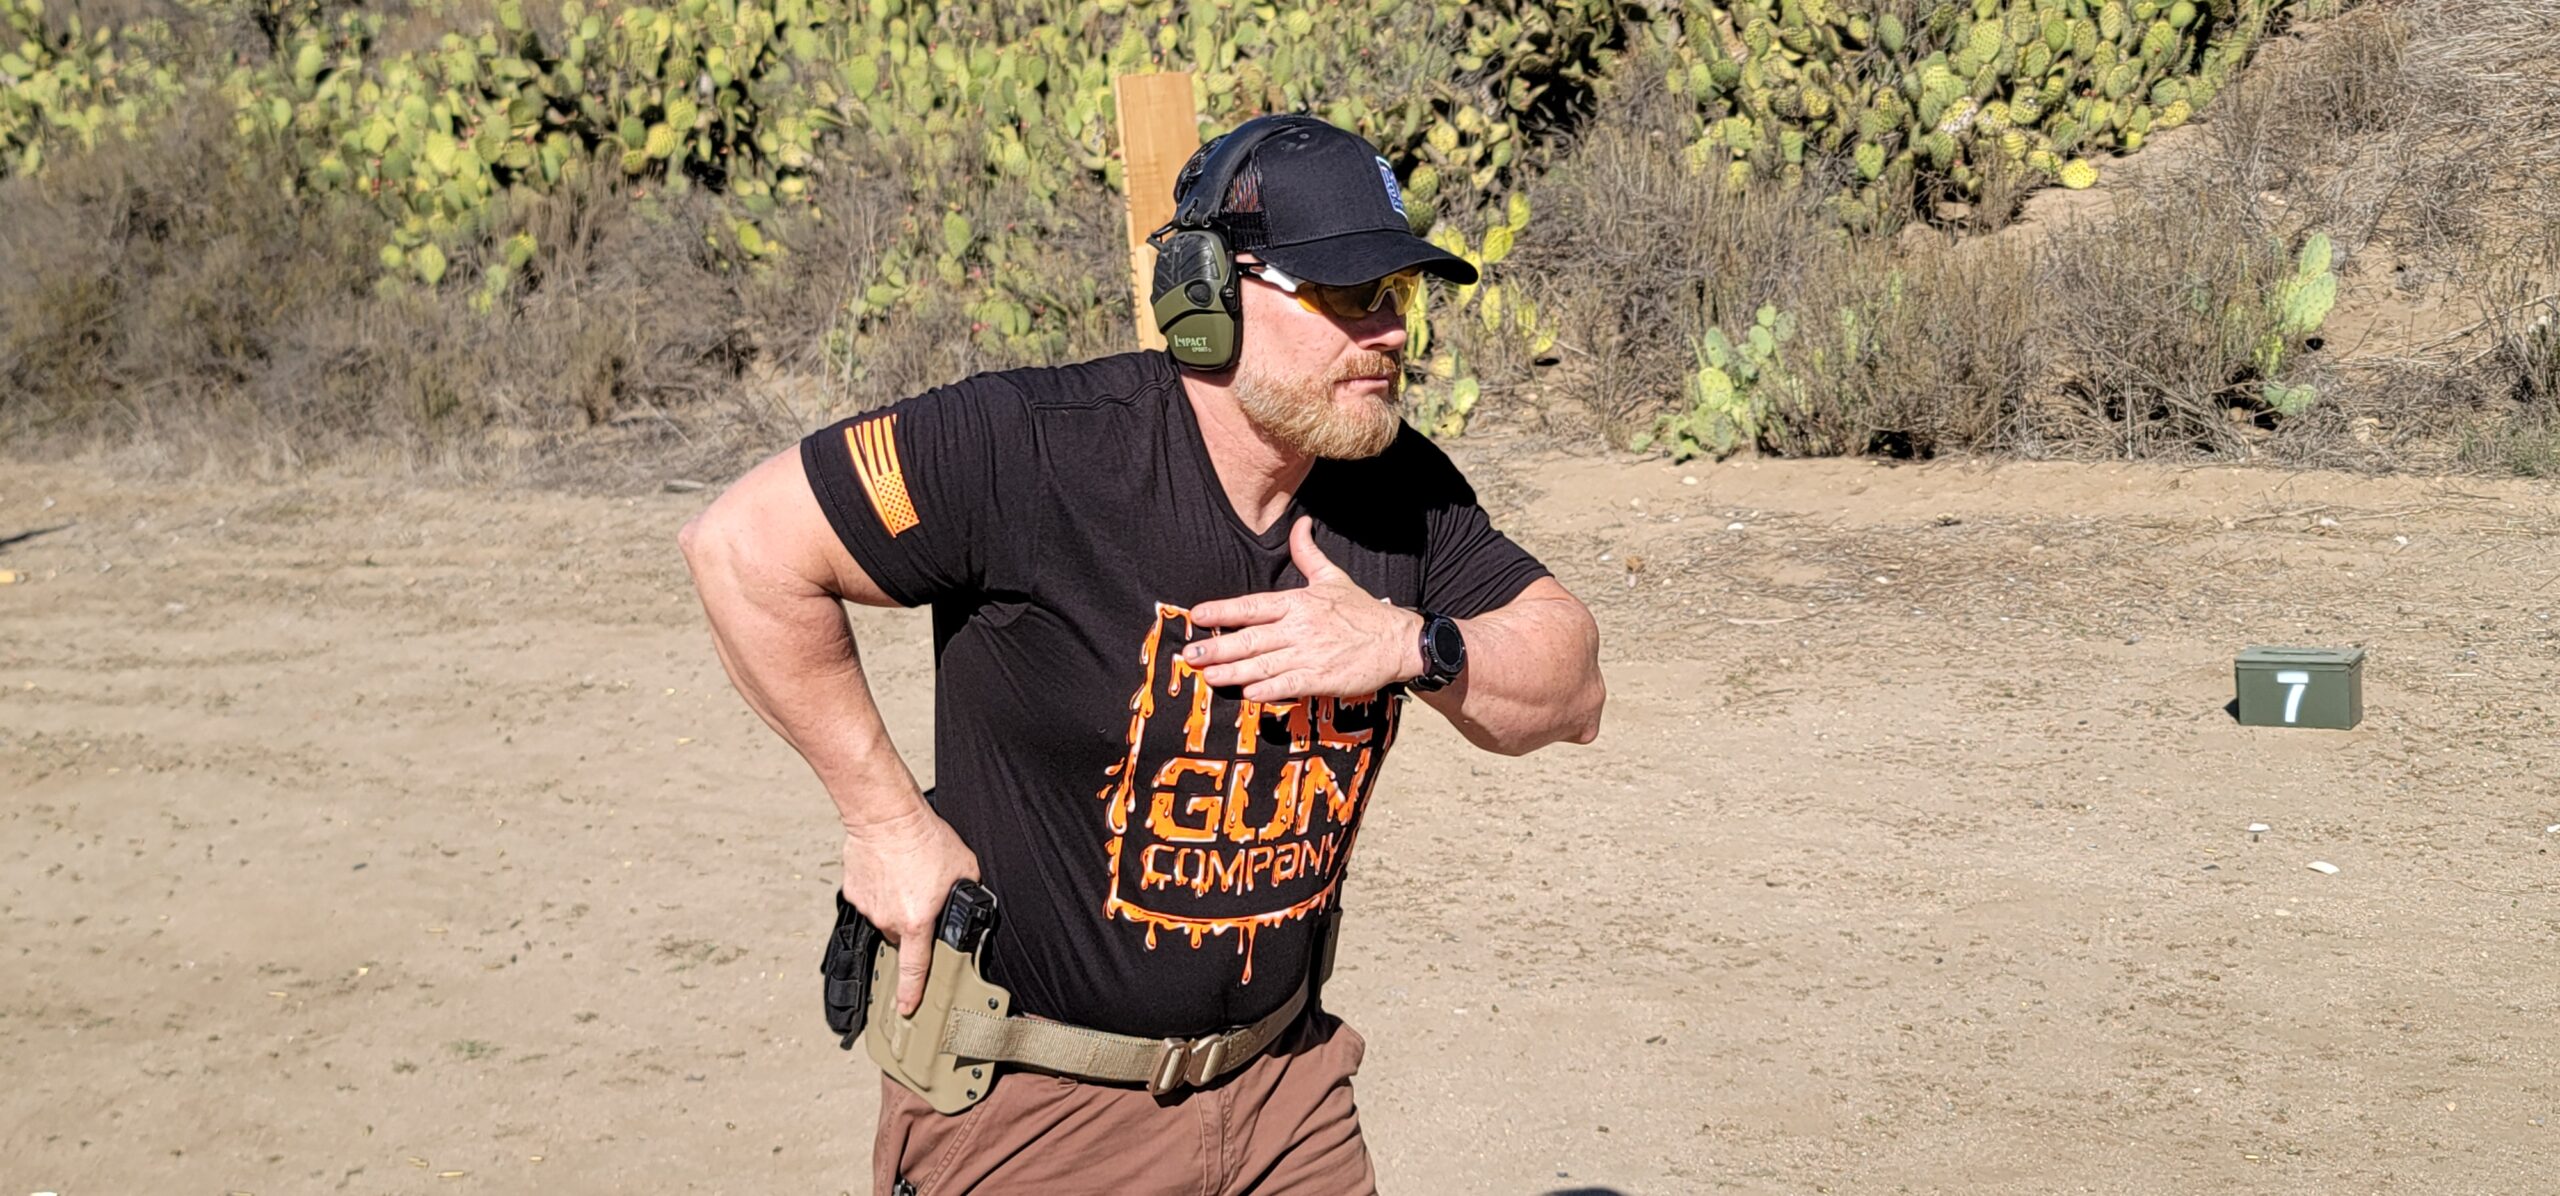
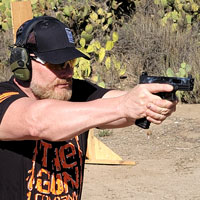
 First step – Understanding how to effectively draw your pistol from your holster. Get into your proper fighter shooting stance. This means your knees are slightly bent, your butt is slightly out, and your chest forward, while standing with your feet about shoulders width apart. Right-handed shooters will have their left foot forward and their right foot back. This is the opposite for a left-handed shooter. Next, keep your hands up for protection, as if you were a boxer and you are getting ready to fight.
 First step – Understanding how to effectively draw your pistol from your holster. Get into your proper fighter shooting stance. This means your knees are slightly bent, your butt is slightly out, and your chest forward, while standing with your feet about shoulders width apart. Right-handed shooters will have their left foot forward and their right foot back. This is the opposite for a left-handed shooter. Next, keep your hands up for protection, as if you were a boxer and you are getting ready to fight.
-
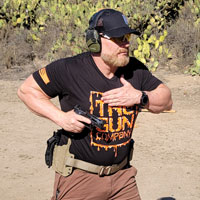
- Second step – Before drawing your pistol, make sure you are able to effectively remove any garment that is concealing your pistol. More detail will be discussed in our upcoming (Carry Concealed Weapon, CCW) class. If no removal of the garment is needed, bring your left hand to the center of your chest in a flat position, and then your right-hand moves to your holster breaking the weapon retention system on the holster I.E. (thumb break, hammer hood, or other retention) along with acquiring a strong grip on the pistol. Your grip on the pistol needs to start with placing your hand high on the backstrap, just below the rear portion of the slide on the back of your pistol. This means there are no spaces between your thumb and your index finger, which this is considered the “V” in your hand.
 Second step – Before drawing your pistol, make sure you are able to effectively remove any garment that is concealing your pistol. More detail will be discussed in our upcoming (Carry Concealed Weapon, CCW) class. If no removal of the garment is needed, bring your left hand to the center of your chest in a flat position, and then your right-hand moves to your holster breaking the weapon retention system on the holster I.E. (thumb break, hammer hood, or other retention) along with acquiring a strong grip on the pistol. Your grip on the pistol needs to start with placing your hand high on the backstrap, just below the rear portion of the slide on the back of your pistol. This means there are no spaces between your thumb and your index finger, which this is considered the “V” in your hand.
-
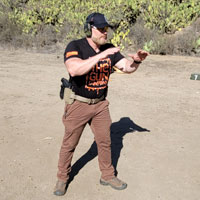
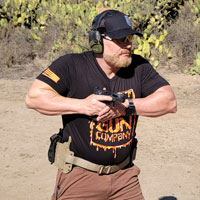
- Third step – Draw your pistol straight up in order to clear your holster. At this time take your pistol off safe, if it has a safety function on your pistol. You can do this by using your right or left thumb, depending on shooter preference. When drawing your pistol with your right hand you want to be high on the backstrap, just under the slide with no gaps, as we said previously. Your three fingers on your right hand will be wrapped around your pistol grip, just under the trigger guard with no gaps to ensure a positive grip. Your right index finger will be pointed straight and off the trigger, along the right side of your pistol slide. Your left hand will marry up on the left side of the pistol. Place the upper part of your palm, which is located just under your thumb high on the pistol grip, just below the slide. Make sure your thumb is in line with the lower part of your pistol’s frame. Your four fingers on your left hand will wrap over the top of the three fingers on your right hand just under the trigger guard, also with no gaps or space. Then point your pistol toward your threat or target, while driving your elbow down and shifting the muzzle from the down position to the high position, just under your right chest muscle at a 90-degree angle.
 Third step – Draw your pistol straight up in order to clear your holster. At this time take your pistol off safe, if it has a safety function on your pistol. You can do this by using your right or left thumb, depending on shooter preference. When drawing your pistol with your right hand you want to be high on the backstrap, just under the slide with no gaps, as we said previously. Your three fingers on your right hand will be wrapped around your pistol grip, just under the trigger guard with no gaps to ensure a positive grip. Your right index finger will be pointed straight and off the trigger, along the right side of your pistol slide. Your left hand will marry up on the left side of the pistol. Place the upper part of your palm, which is located just under your thumb high on the pistol grip, just below the slide. Make sure your thumb is in line with the lower part of your pistol’s frame. Your four fingers on your left hand will wrap over the top of the three fingers on your right hand just under the trigger guard, also with no gaps or space. Then point your pistol toward your threat or target, while driving your elbow down and shifting the muzzle from the down position to the high position, just under your right chest muscle at a 90-degree angle.
-
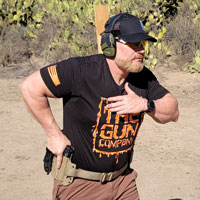
- Fourth Step – Your hands meet high at the center of your chest. Make sure to not remove your left hand from your chest before marrying your right hand, with your left hand. This will prevent you from flagging your left hand.
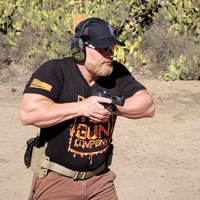
 Fourth Step – Your hands meet high at the center of your chest. Make sure to not remove your left hand from your chest before marrying your right hand, with your left hand. This will prevent you from flagging your left hand.
-
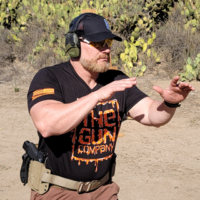
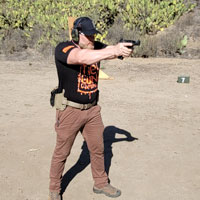
- Fifth Step – Extend the pistol straight toward the target or threat with a two-handed grip on the pistol. This is what we call a push, pull, 60-40. This means you punch out with your right hand and pull back with your left hand while applying 60% pressure with your left hand to the left side of the pistol and 40% with your right hand to the right side of the pistol. This allows you to squeeze the trigger lightly. If you try and squeeze your pistol with both hands at 100%, you will not be able to effectively pull the trigger on your pistol. If you don’t believe me, try it and you will get the point very quickly.
- Fifth Step – Extend the pistol straight toward the target or threat with a two-handed grip on the pistol.
 This is what we call a push, pull, 60-40. This means you punch out with your right hand and pull back with your left hand while applying 60% pressure with your left hand to the left side of the pistol and 40% with your right hand to the right side of the pistol. This allows you to squeeze the trigger lightly. If you try and squeeze your pistol with both hands at 100%, you will not be able to effectively pull the trigger on your pistol. If you don’t believe me, try it and you will get the point very quickly.
-
- While you are applying the proper grip to your pistol you will begin to take the slack out of the trigger, until you hit what is called the back wall of the trigger. This will occur right before the pistol is ready to fire, and any more pressure on the trigger and your weapon will fire. One important thing to note is finger placement on the trigger. Don’t get wrapped around this too much, whether it’s the tip of your finger, in the middle of your finger, or at the first bend in your finger. The most important thing is to pull the trigger straight back to the rear, without slapping or jerking the trigger left or right. Also, always remember to slowly let the trigger out until you feel or hear an audible click. This is just the sear re-engaging, letting you know you are now able to fire another round. Another key point to note, is to never ever take your finger off of the trigger until you are done firing your weapon. This enables you to have a constant pull on the trigger without having to refine your proper finger placement on the trigger. Now, remember you are applying all of these steps as you begin to fully extend your firearm from the center of your chest toward your target or threat.
-
- Sixth-Step – As you begin to fully extend your pistol toward your target or threat, you are starting to pick up your front sight post and align your sights, which is called sight alignment. This is also in conjunction with your sight picture and front sight focus.
 Sixth-Step – As you begin to fully extend your pistol toward your target or threat, you are starting to pick up your front sight post and align your sights, which is called sight alignment. This is also in conjunction with your sight picture and front sight focus.
-
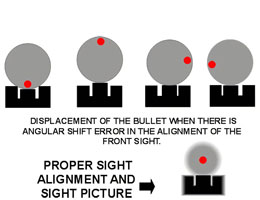
- Sight alignment means lining up your rear sight post with your front sight post, while making sure you have even spacing or light on the left and right sides of your front sight post. Everything between your front sight and rear sight post should be on an even plain.
 Sight alignment means lining up your rear sight post with your front sight post, while making sure you have even spacing or light on the left and right sides of your front sight post. Everything between your front sight and rear sight post should be on an even plain.
-
- There are some similarities between sight alignment and sight picture. The sight picture is aligning the front sight post in the rear sight post, and matching the height of the front sight post with the rear sight post, while maintaining a focus on the front sight post. In other words, a sight picture is the proper sight alignment, while aiming at the target or threat you intend to shoot.
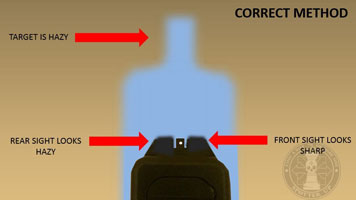 There are some similarities between sight alignment and sight picture. The sight picture is aligning the front sight post in the rear sight post, and matching the height of the front sight post with the rear sight post, while maintaining a focus on the front sight post. In other words, a sight picture is the proper sight alignment, while aiming at the target or threat you intend to shoot.
-
- Front Sight Focus is focusing on your front sight post so intently that your actual sight picture, threat, or target appears to be blurry.
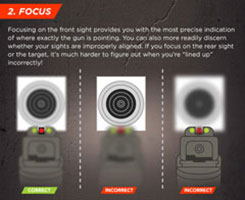 Front Sight Focus is focusing on your front sight post so intently that your actual sight picture, threat, or target appears to be blurry.
-
- All of this is great to know, but if you don’t understand which eye to shoot with, it’s pointless. Are you supposed to use your right eye or left eye, or is it both? Typically, people shoot with one eye closed and one eye open, which is their dominant eye. However, if you are in a close-quarter battle (CQB) environment having one eye closed is hugely detrimental to your situational awareness . You need to be able to see everything around you, your life depends on it. You do this by slightly closing your non-dominant eye while keeping your dominant eye open. This allows you to still have your peripheral vision and front sight focus, enabling you to see everything in your environment.
- All of this is great to know, but if you don’t understand which eye to shoot with, it’s pointless. Are you supposed to use your right eye or left eye, or is it both? Typically, people shoot with one eye closed and one eye open, which is their dominant eye. However, if you are in a close-quarter battle (CQB) environment having one eye closed is hugely detrimental to your situational awareness .
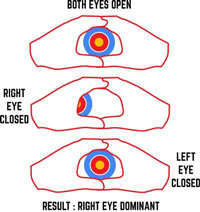 You need to be able to see everything around you, your life depends on it. You do this by slightly closing your non-dominant eye while keeping your dominant eye open. This allows you to still have your peripheral vision and front sight focus, enabling you to see everything in your environment.
-
- You should start to see your front sight post come into your view when the pistol is about halfway out from your chest.
-
- As you begin to fully extend your pistol in the direction of your target or threat, your right and left arm will be slightly bent at the elbows to help control the recoil of your firearm. Also, your right and left wrists will be rigid and locked out. Your right arm will also be slightly higher than your left arm for stability.
Now the decision is up to you. How proficient do you want to become with your pistol? Practice each step slowly, remember slow is smooth & smooth eventually equals fast. Only go as quick as your skill set will allow. Don’t worry about speed at first, believe me, it will come. And don’t forget — it’s a perishable skill set, so it needs to be integrated with your regular training program, especially your daily dry-firing routine. I highly suggest you begin today. Why put off tomorrow what can be accomplished today, especially if one day your life may depend on it.

